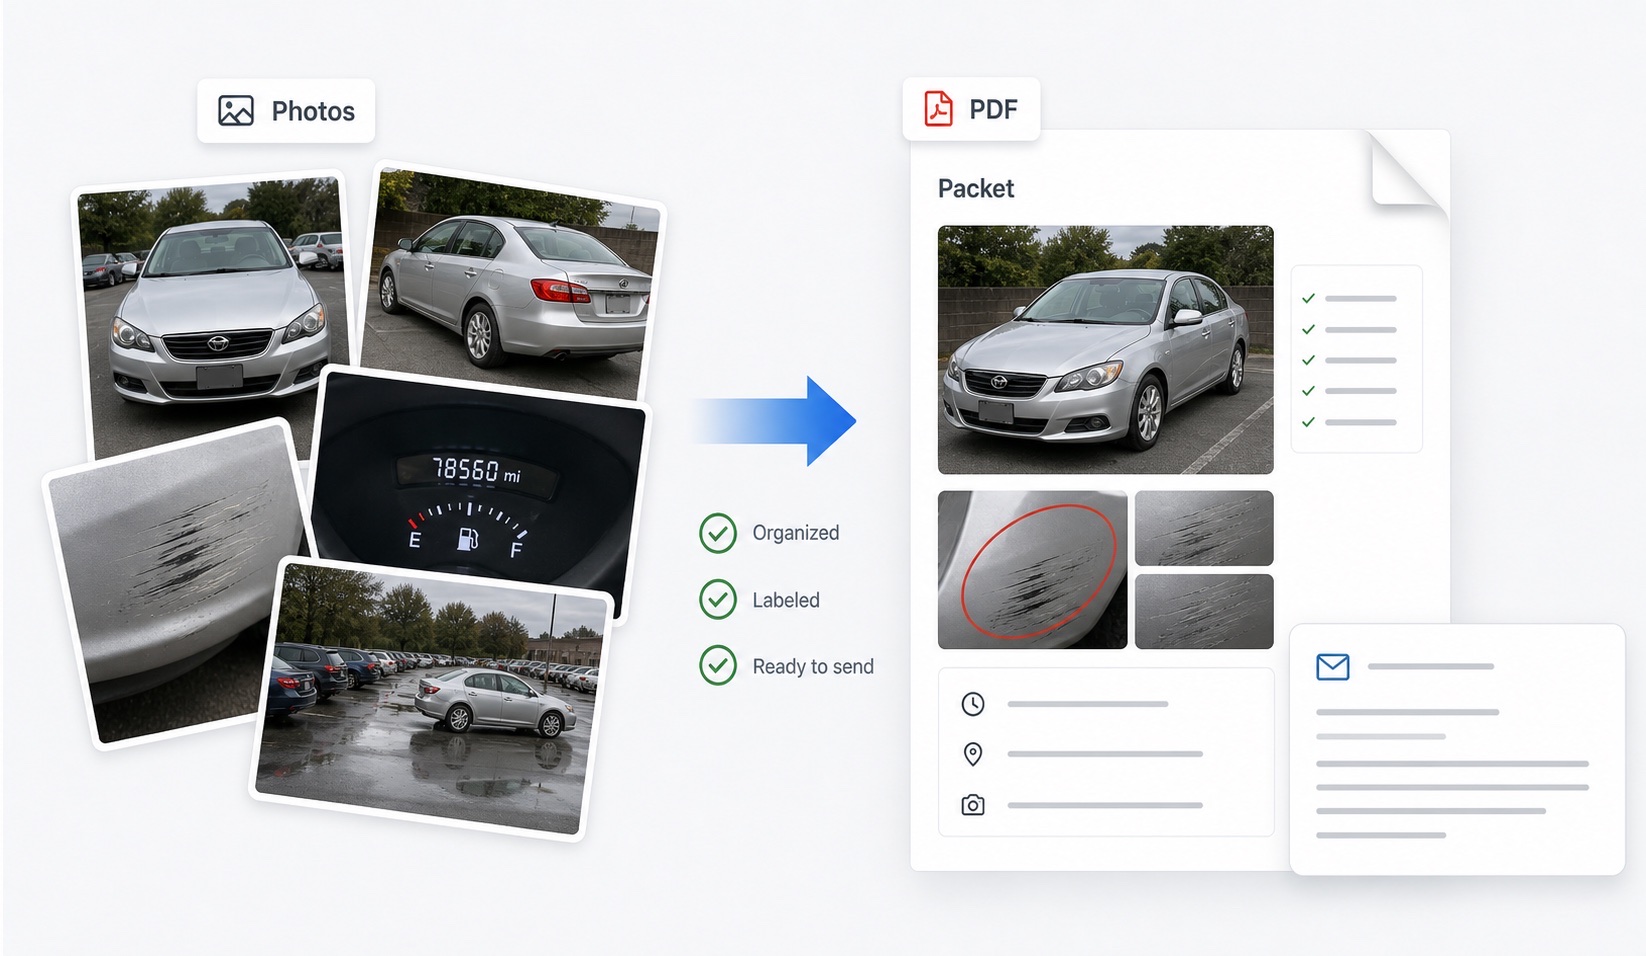
How to Take Photos for a Car Damage Report
A practical phone-photo checklist for documenting car damage with wide shots, closeups, matched angles, timestamps, and missing-evidence notes.
Start wide, then move closer
Take the full vehicle from front, rear, driver side, passenger side, and all four corners before taking closeups. Wide photos prove where the closeup sits on the car.
Match the same angles
If you have before photos, repeat the same angle, distance, and lighting as closely as possible. Matched angles are easier to review than random closeups.
Include proof around the photo
Capture the odometer, fuel gauge, rental lot, repair shop, receipt, claim number, or location context when it helps explain when and where the vehicle was documented.
FAQ
What photos are best for a car damage report?
Use wide shots for context, closeups for damage, matched before-and-after angles when available, and photos that show date, location, odometer, or receipt context.
Should I edit car damage photos before submitting them?
Do not rely on edited photos. Keep originals and use a report packet to label and organize what each photo shows.