
What Photos Do Insurance Adjusters Need for Car Damage?
The photo set insurance adjusters actually work from: full-vehicle context, damage close-ups, adjacent panels, VIN and odometer shots, and how to organize the set so the claim moves instead of stalling.
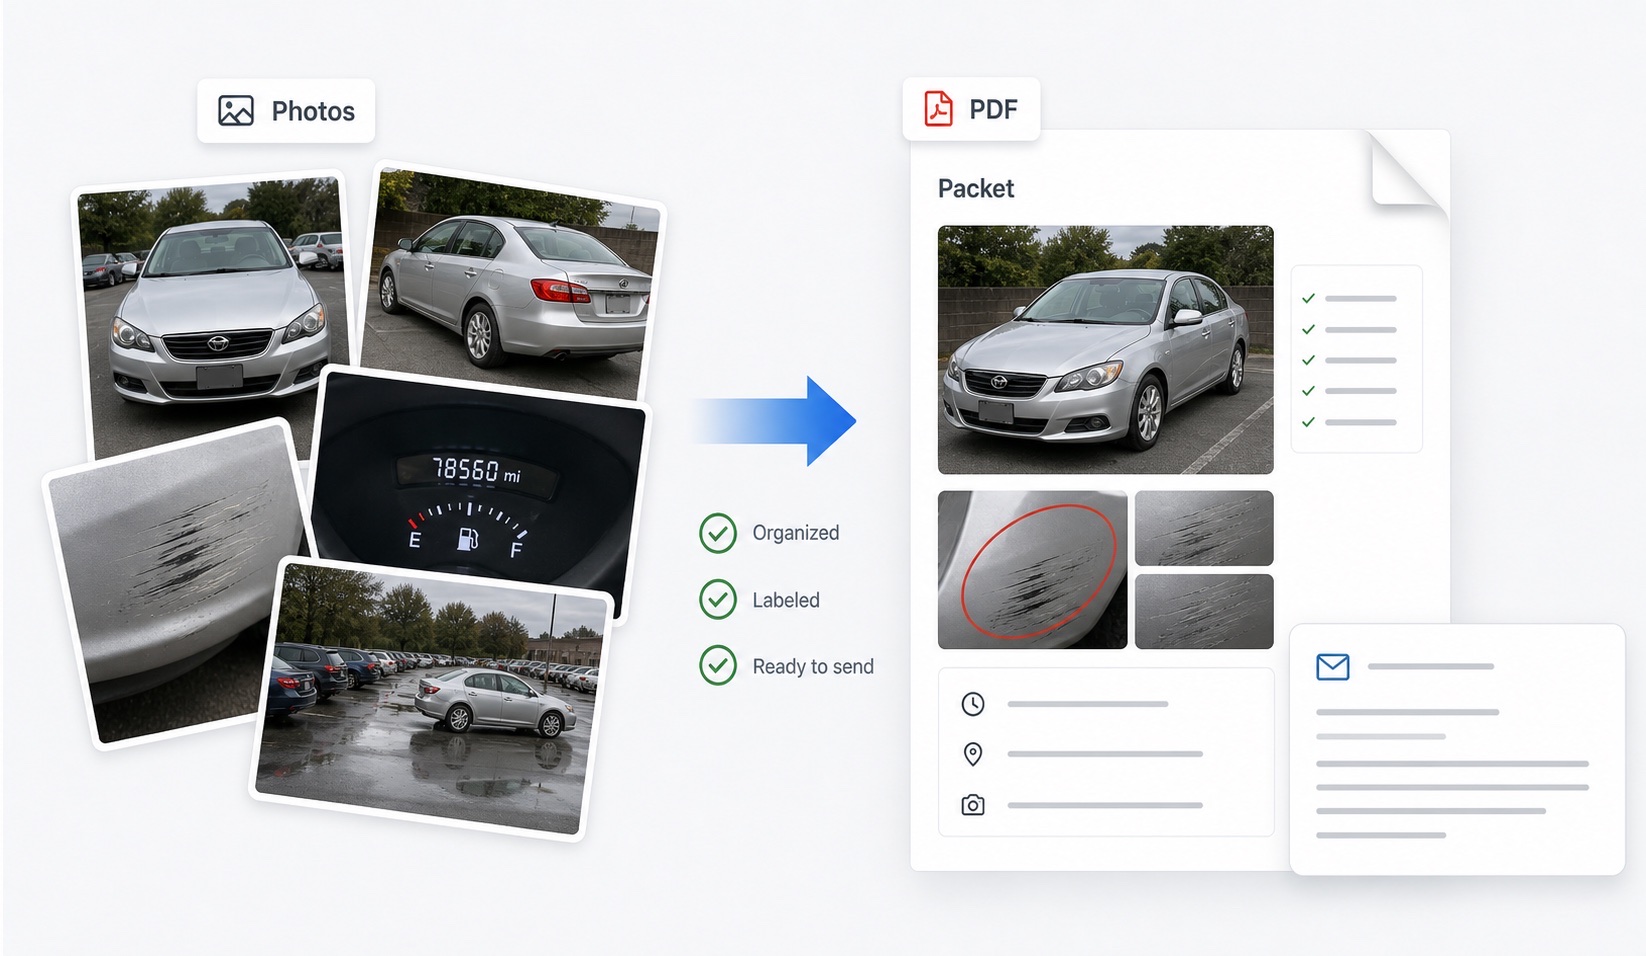
What photo set does an adjuster actually work from?
Adjusters assess two things from images: what is damaged, and what it will take to repair. The set that answers both without follow-up requests looks like this:
| Photo group | Contents |
|---|---|
| Full vehicle | Front, rear, both sides, four corners — the whole car in frame |
| Damage, wide | Each damaged panel with a landmark (wheel, door seam) visible |
| Damage, close | Detail shots, at least one with an object for scale |
| Adjacent areas | Panels, trim, lights, and glass bordering the damage |
| Identifiers | VIN plate or plate number when requested; odometer if mileage matters |
| Mechanical clues | Fluid leaks, tire and wheel damage, warning lights on the dash |
| Context | Scene, tow, storage, or document shots as relevant |
Shoot in that order and you will rarely be asked for a re-shoot — the most common cause of a stalled photo estimate.
Why does the adjuster need the whole car, not just the dent?
Because a close-up proves a mark exists, not which car it is on, how big it is, or whether the rest of the vehicle was already worn. Full-vehicle shots do quiet but essential work: they tie the damage to a specific, identifiable vehicle; they establish baseline condition so pre-existing damage cannot be silently folded into the claim (protecting honest claimants as much as insurers); and they show the damage in proportion — a frame-filling scratch reads as severe until the wide shot reveals it spans six centimeters.
The habit to build: never submit a close-up that cannot be traced to a wide shot. Wide establishes the car, medium establishes the panel, close establishes the damage. Every reviewer — adjuster, rental claims agent, card benefit administrator — reads photo sets through that chain, whether they articulate it or not.
What do adjacent-panel photos reveal?
Collision energy travels, and modern vehicles hide much of the consequence. A bumper impact can push the bumper bar into the radiator support, misalign headlights, kink the hood edge, and disturb panel gaps two panels away — while the bumper cover itself springs mostly back into shape. Adjacent-panel photos give the adjuster the evidence to anticipate this: shoot the panels on both sides of the visible damage, the nearest lights and glass, the wheel and tire if the impact was anywhere near a corner, and panel gaps where they look uneven (a straight-down shot along the seam shows deviation well).
Under-hood or under-car shots are worth taking when safe and visible — fluid on the ground after a front impact changes an estimate materially. None of this requires expertise; it requires photographing the neighborhood of the damage, not just the damage.
How should the photos be organized and sent?
Send a labeled, ordered set through whatever channel the insurer specifies — app upload, email, or portal — and follow the format they ask for. Within that: order images from wide to close, group by vehicle area, caption each with date and subject, and include a one-paragraph cover note listing what is attached and any known gaps (“no under-hood photos; the hood is jammed shut”). Keep unedited originals with metadata intact and say they are available on request — app-based submissions sometimes compress images, and the originals resolve any quality dispute.
A packet-style presentation — the structure DamagePacket produces from uploaded photos — is genuinely useful here, but the principle is tool-independent: the adjuster should be able to reconstruct your vehicle's condition in two minutes of scrolling, without phoning you to ask what image 14 shows.
What photo mistakes cause claim delays?
From the adjuster's side of the desk, the recurring time-wasters are predictable: only close-ups, requiring a full re-shoot request; a dirty car, where mud reads as damage and hides real damage; night photos of dark panels without flash or bracing, unusable for estimating; the damaged area photographed but the impact's neighborhood skipped, forcing an in-person inspection that photo estimating would have avoided; and photos taken after the car was moved, washed, or partially disassembled, breaking the chain between incident and image.
Two habits prevent nearly all of it. Photograph early — at the scene when safe, and certainly before repair or cleaning. And photograph systematically: same sequence every time, wide to close, all sides, identifiers last. Five extra minutes of coverage routinely saves two weeks of claim correspondence.
FAQ
How many photos should I send an insurance adjuster?
A complete but curated set — commonly 15 to 30 images: full-vehicle shots from all sides, the damaged areas wide and close, adjacent panels, VIN or plate when requested, odometer if relevant, and scene or document context. Keep the rest of what you shot in reserve.
Should I send every photo in my camera roll?
No. Duplicates and near-identical frames bury the important images. Send a labeled, ordered set and note that additional originals are available. Adjusters can always ask for more; they cannot un-skim a chaotic upload.
Why do adjusters want photos of undamaged areas?
Full-vehicle shots establish overall condition, prove which vehicle is involved, and rule pre-existing damage in or out. A file containing only close-ups of damage leaves the rest of the car undocumented, which invites follow-up requests and delay.
Can an adjuster settle a claim from photos alone?
Often, yes — many insurers run photo-based estimating for lighter damage, sometimes through their own app. More severe or ambiguous damage still gets an in-person or shop inspection, and hidden damage found during repair is handled through supplemental estimates.
Should I photograph the car before it goes to the shop?
Yes, always. Once repairs begin, the pre-repair condition exists only in photos. Shoot the full sequence before towing when safe, and again before the shop starts work — the before-repair checklist guide covers the details.